How To Fix A Hole In The Wall: A Step-by-Step Guide That’ll Make Your Walls Look Brand New Again
So you’ve got a hole in your wall, huh? Whether it’s from a picture frame that fell, a door that got slammed too hard, or maybe even a little accident involving a basketball—don’t worry, you’re not alone. Fixing a hole in the wall might sound intimidating, but trust me, it’s way easier than you think. With the right tools and a bit of patience, you can have your walls looking like new in no time.
Let’s be honest, holes in walls are one of those things that always seem to happen at the worst possible moment. Maybe you’re getting ready for a big event, or maybe you just want to sell your house and need it to look pristine. Either way, fixing that hole is essential if you want to keep things looking sharp. And guess what? You don’t need to be a professional contractor to get the job done.
In this guide, we’ll walk you through everything you need to know about how to fix a hole in the wall. From small dings to larger damage, we’ve got all the tips and tricks you’ll ever need. So grab your tools, roll up your sleeves, and let’s dive into it!
Read also:Marie Temara Leaks The Untold Story Behind The Viral Sensation
Table of Contents
- Understanding the Problem: What Causes Holes in Walls?
- Tools You’ll Need to Fix That Hole
- Step-by-Step Guide: How to Fix a Hole in the Wall
- Fixing Small Holes in Walls: Quick and Easy Fixes
- Fixing Large Holes in Walls: The Big Fix
- Common Mistakes to Avoid When Fixing Walls
- Tips for Perfect Results Every Time
- Choosing the Right Materials for Your Wall Fix
- Cost Considerations: How Much Will It Set You Back?
- When to Call a Professional: Know Your Limits
Understanding the Problem: What Causes Holes in Walls?
Before we dive into the solutions, let’s talk about the problem itself. Holes in walls can happen for a variety of reasons, and understanding the cause can help you prevent them in the future. Here are some common culprits:
- Doors slamming into walls
- Hanging heavy picture frames without proper anchors
- Accidents involving sports equipment (looking at you, basketballs)
- Pets or kids being a little too rough
Regardless of how the hole got there, the good news is that most wall repairs are pretty straightforward. Whether it’s a tiny pinhole or a gaping hole the size of a basketball, there’s a solution out there for you.
Tools You’ll Need to Fix That Hole
Before you start fixing that hole, it’s important to gather all the tools you’ll need. Here’s a quick rundown of what you’ll need for most wall repairs:
- Spackle or joint compound
- A putty knife (small and medium-sized)
- Sandpaper (fine grit)
- A patch kit (for larger holes)
- Paint that matches your wall color
- A primer (optional, but recommended)
Don’t worry if you don’t have all these tools on hand—you can usually pick them up at your local hardware store for a reasonable price. And trust me, they’re worth the investment if you plan on doing any DIY home repairs in the future.
Step-by-Step Guide: How to Fix a Hole in the Wall
Now that you’ve got your tools ready, let’s get into the nitty-gritty of how to fix a hole in the wall. Here’s a step-by-step guide to help you get the job done:
Step 1: Clean the Area Around the Hole
Before you start patching, make sure the area around the hole is clean and free of dust or debris. Use a damp cloth to wipe down the area, and let it dry completely before moving on.
Read also:Livvy Dunne Nude Leak The Truth Behind The Viral Hype
Step 2: Apply Spackle or Joint Compound
Using a putty knife, apply a thin layer of spackle or joint compound over the hole. Make sure to spread it evenly, and try to keep the edges as smooth as possible. Don’t worry if it doesn’t look perfect right away—you’ll be sanding it later.
Step 3: Let It Dry
Give the spackle or joint compound plenty of time to dry. This can take anywhere from a few hours to overnight, depending on the size of the hole and the humidity in your area. Be patient—rushing this step can lead to uneven patches.
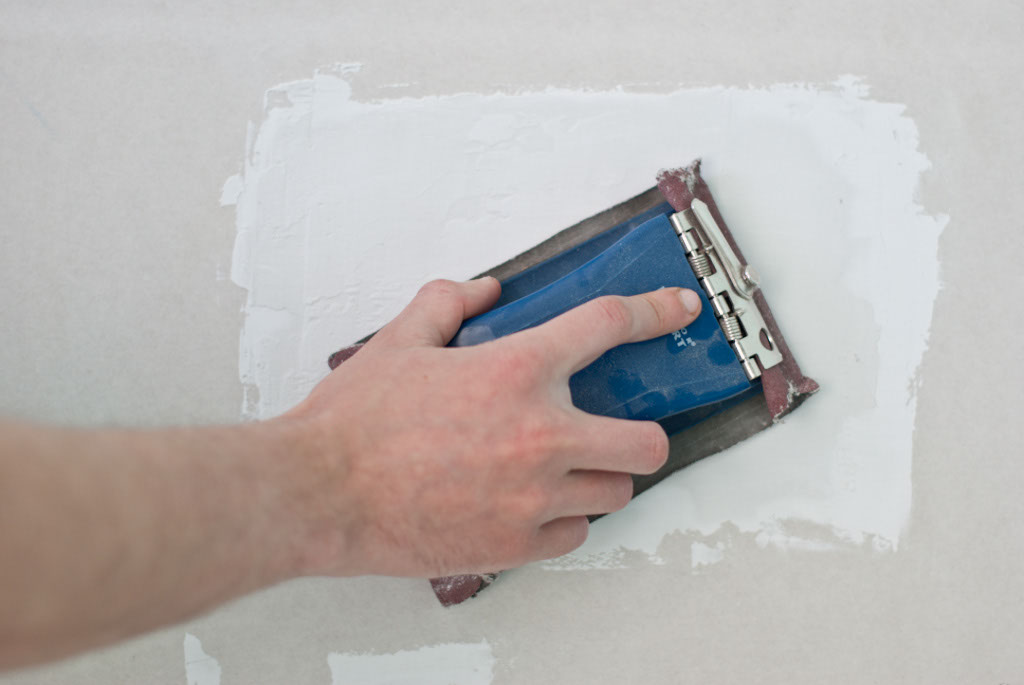
Step 4: Sand the Area
Once the spackle is dry, use fine-grit sandpaper to smooth out the area. Sand in small, circular motions until the patch is level with the rest of the wall. Be careful not to sand too aggressively, or you might end up creating more damage.
Step 5: Paint the Area
Finally, touch up the area with paint that matches your wall color. If the patch is large, you might want to apply a primer first to ensure the paint adheres properly. Once the paint is dry, you’re good to go!
Fixing Small Holes in Walls: Quick and Easy Fixes
Small holes, like those left by nails or screws, are some of the easiest repairs you’ll ever do. Here’s how to fix them:
- Use a small putty knife to apply spackle or joint compound directly over the hole.
- Smooth it out with the edge of the knife, making sure it’s level with the wall.
- Let it dry completely, then sand it lightly with fine-grit sandpaper.
- Touch up the area with paint, and you’re done!
See? I told you it was easy!
Fixing Large Holes in Walls: The Big Fix
When it comes to larger holes, the process is a bit more involved, but still totally doable. Here’s what you’ll need to do:
Step 1: Cut Out the Damaged Area
Using a utility knife, carefully cut away any loose or damaged drywall around the hole. This will give you a clean edge to work with.
Step 2: Install a Patch
For larger holes, you’ll need to use a drywall patch kit. These usually come with a metal frame that you can attach to the wall using screws or nails. Once the frame is in place, cut a piece of drywall to fit inside the frame and secure it in place.
Step 3: Apply Joint Compound
Use a putty knife to apply joint compound over the patch, smoothing it out as you go. Let it dry completely, then sand it down until it’s level with the rest of the wall.
Step 4: Paint the Area
Finish off by painting the area to match the rest of your wall. If the patch is large, you might want to apply a primer first to ensure the paint adheres properly.
Common Mistakes to Avoid When Fixing Walls
Even the best DIYers make mistakes sometimes, but here are a few common ones to watch out for:
- Not letting the spackle dry completely before sanding
- Using the wrong type of spackle or joint compound
- Not matching the paint color properly
- Rushing the process and ending up with uneven patches
By avoiding these mistakes, you’ll be well on your way to a perfect repair every time.
Tips for Perfect Results Every Time
Here are a few extra tips to help you achieve flawless results:
- Use a primer before painting to ensure the new paint matches the rest of the wall.
- Apply thin layers of spackle or joint compound instead of trying to fill the hole all at once.
- Work in a well-ventilated area to avoid breathing in dust or fumes.
- Take your time—rushing the process can lead to mistakes.
With these tips in mind, you’ll be able to fix any hole in your wall like a pro.
Choosing the Right Materials for Your Wall Fix
Not all spackles and joint compounds are created equal, so it’s important to choose the right one for your project. Here’s a quick guide:
- Spackle: Best for small holes and cracks. Dries quickly and easy to sand.
- Joint Compound: Ideal for larger holes and patches. Takes longer to dry, but provides a smoother finish.
- Drywall Patch Kits: Perfect for larger holes. Comes with everything you need for a professional-looking repair.
Make sure to read the labels carefully and choose the material that best suits your needs.
Cost Considerations: How Much Will It Set You Back?
One of the great things about fixing a hole in the wall is that it’s usually pretty affordable. Here’s a rough estimate of what you can expect to spend:
- Spackle or joint compound: $5-$10
- Putty knife: $5-$15
- Sandpaper: $2-$5
- Drywall patch kit: $10-$20
- Paint and primer: $10-$30
Of course, prices can vary depending on where you live and the quality of the materials you choose. But overall, fixing a hole in the wall is a budget-friendly project.
When to Call a Professional: Know Your Limits
While most wall repairs are DIY-friendly, there are times when it’s best to call in a professional. If the hole is extremely large, or if the damage extends beyond the surface of the wall, it might be time to seek help. Professionals have the tools and expertise to handle even the toughest repairs, and they can often do it faster and more efficiently than you could on your own.
Conclusion
Fixing a hole in the wall doesn’t have to be a daunting task. With the right tools, materials, and a bit of patience, you can have your walls looking like new in no time. Remember to clean the area thoroughly, apply spackle or joint compound evenly, and take your time with the sanding and painting. And if the hole is too big for you to handle on your own, don’t hesitate to call in a professional.
So what are you waiting for? Grab your tools and get to work! And when you’re done, don’t forget to share your success story in the comments below. Who knows? You might just inspire someone else to tackle their own wall repair project!

